

Update: Drew reached out to… give me the credit! Thank you~

There’s nothing better than learning for fun and profit, so when I spotted Drew Firment’s (SVP at A Cloud Guru) challenge on LinkedIn to earn one thousand United States dollars worth of the finest AWS Credits in existence, I jumped at the chance.
By the way, I’m doing these challenges with a coffee on “National Foundation Day” here in Tokyo, Japan. No better way to spend a day off than indoors with snow outside, a warm beverage and the AWS Console.
Here’s the list of challenges if you’re following along.
Pst! I’ve been an AWS Cloud Guru user for more than a year now (happy re-subscribed and upgraded to the highest plan on my second run).
Challenge 1 – Launch a static website on Amazon S3

As expected, one of the “easiest” challenges is the first one. AWS S3 with AWS CloudFront to host a static site, which I highly encourage every AWS learner to try. It really demonstrates the power of the AWS platform. However, I won’t use Route 53, on account of it ruining the PAYG nature of the stack. CloudFlare is free, and when you’re learning, every cent counts!
You’ll just need to add the ACM DNS records to CloudFlare manually, which is a couple extra steps compared to the “Add to Route 53” button in the console. Definitely worth it to save the $0.50 per hosted zone per month ($6 / year). Sorry ACG, I won’t be spending my AWS Credit on Route 53 hosted zones!
Also, to save a few steps and not enable bucket hosting on the S3 bucket, use a CloudFront origin access identity (OAI) to access the S3 bucket. Super easy and CloudFront will even add the policy for you if you tick the box!
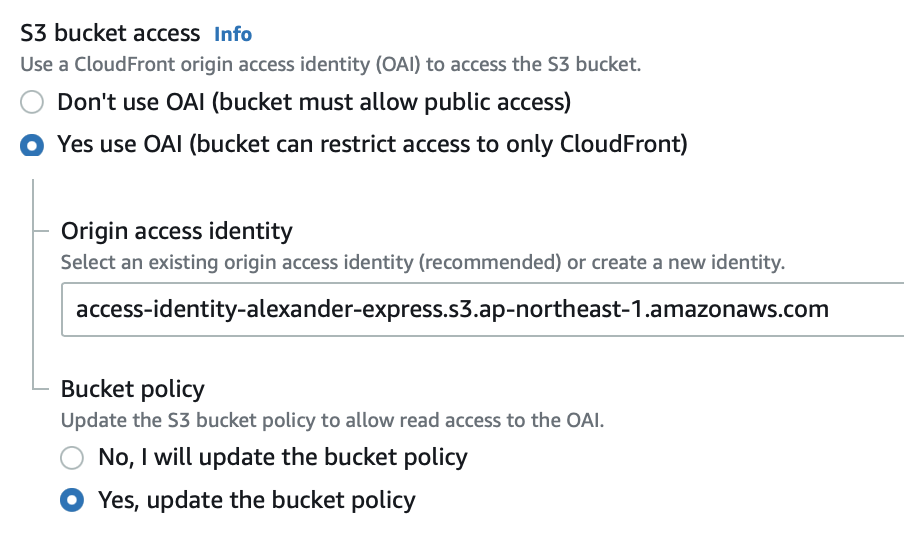
And here it is!
Challenge 2 – Use CloudFormation to Launch an Amazon EC2 Web Server
This one’s a little bit more complicated. We dive into one of the most powerful automation tools on the AWS platform, CloudFormation. And whilst it can be super tempting to skip ahead and just do it yourself- if you’re a first timer, I would suggest just following the tutorial. It will teach you a lot, and is well worth the half an hour. Promise!
My template is a little different, in much the same realm as the previous challenge. I want to reduce costs and use modern systems. So I picked t4g.nano and changed the mappings with the newest AMI identifiers as well, keeping only the ap-northeast-1 and us-east-1 regions.
In addition to this, I also reduced the subnet size to a /24. Even that’s overkill for a single host.
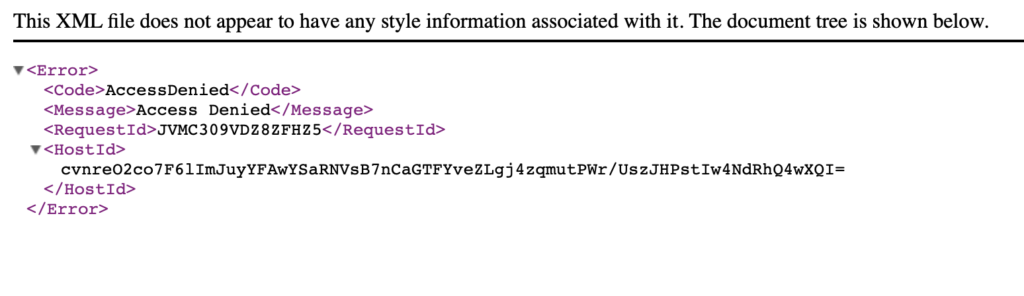
Since we use Terraform and Kubernetes at my current workplace, using CloudFormation again really reminds me how little AWS seems to care for this killer feature. The only options to save a template are still “your device” (which opens a new tab with the text instead of downloading it to my device), and “Amazon S3” (which is actually a bucket that you don’t control, nor can you access it from anywhere except CloudFormation). You have to download it yourself, upload it to a bucket you control, and grant public access in order to use features such as the Launch Stack button.
Amazon, if you’re listening, please make a “Notebook style” a la Jupiter CloudFormation interface. It would be killer!
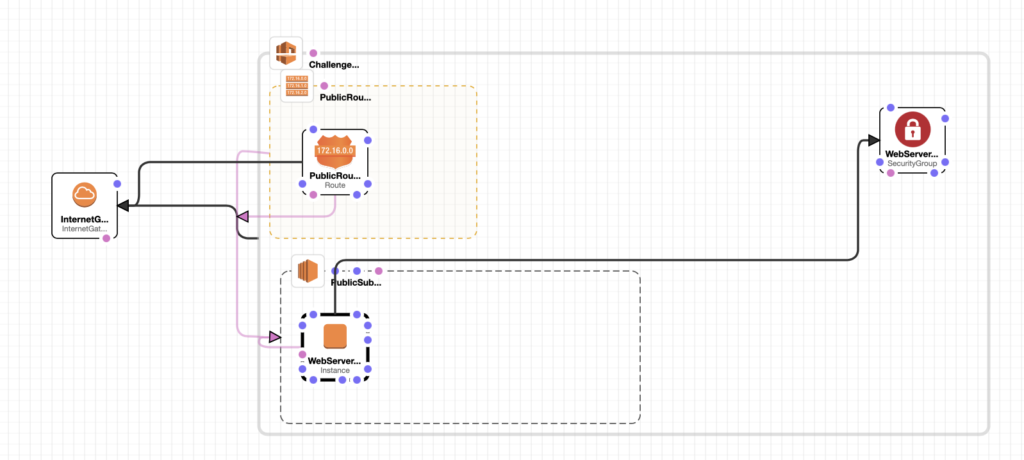
Luckily for me, the instance launched the first time, with my custom “oh ho ho and a bottle of rum” message showing on the default port 80.
Challenge 3 – Add a CI/CD pipeline to an Amazon S3 bucket
Oooh, an opportunity to reuse Challenge 1’s infrastructure! Don’t mind if I do. If you’re following these challenges in order at home, this is definitely the one I would do as Challenge 2, since you can skip all the way to the Create a pipeline step.
It never ceases to amaze me how little AWS cares about AWS CodeCommit. Even their Prescriptive Guidance documentation tells you to go use GitHub! For shame. Honestly, for experimentation or personal projects, go use GitHub actions or Semaphore CI for a sweet free tier. And you won’t be charged simply for having the pipeline sitting there. Although, for learning purposes, you do get a single free CodePipeline which isn’t really that generous.
Anyway, here’s what I came up with. Make sure to have S3 bucket versioning turned on!
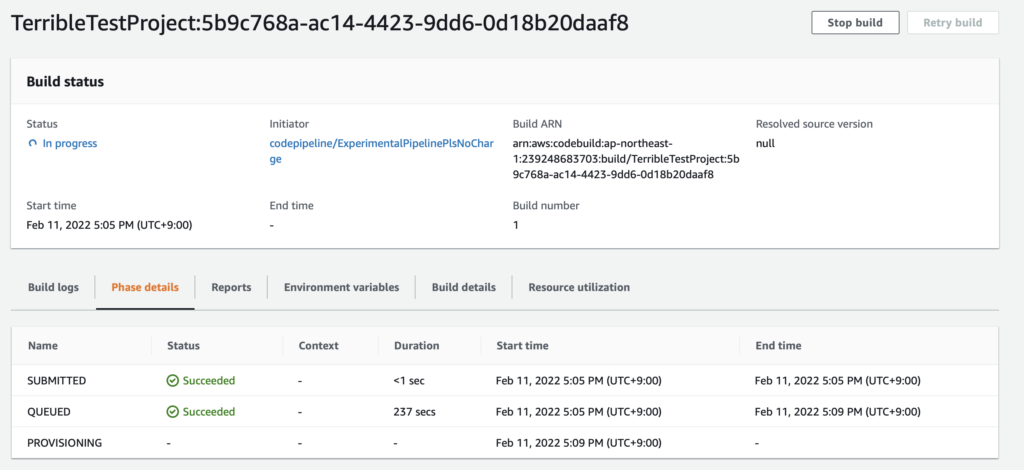
It takes the source, a zipped version of the index.html file from the Amazon S3 bucket, runs a CodeBuild pipeline to change a single word, then re-deploys the changed index.html back to S3. Fun, and simple!
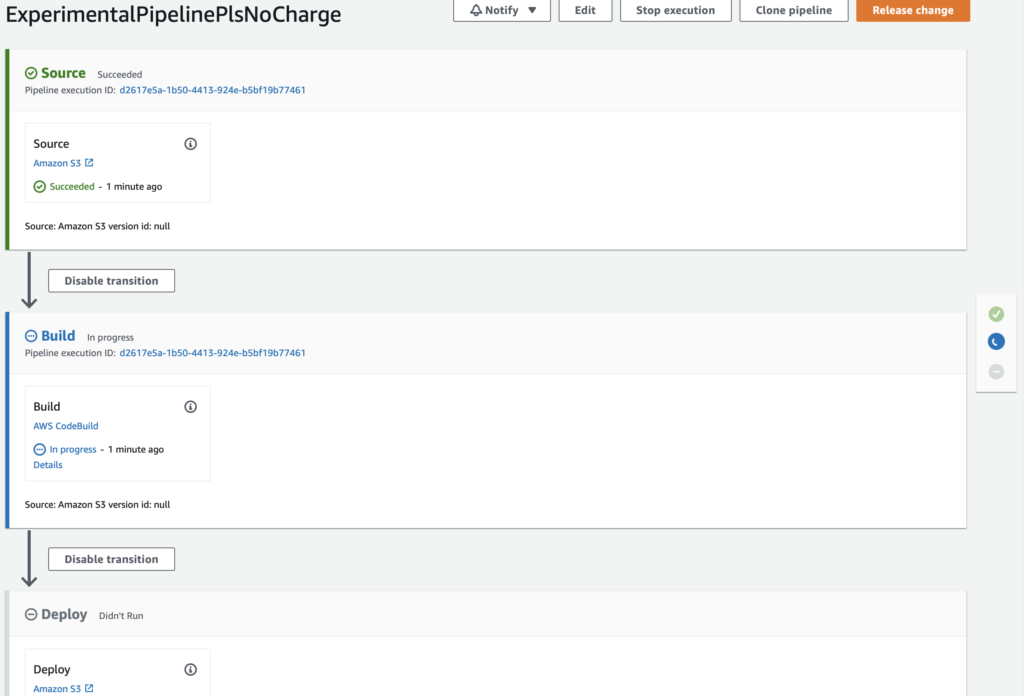
Check out that queue time… what happened?
Challenge 4 – Publish Amazon CloudWatch metrics to a CSV file using AWS Lambda (?)
Now we’re getting into the juicy part of AWS! Lambda is one of my favourite services. But this tutorial doesn’t use Lambda despite the name! You can get some metrics from Lambda using this though…
By the way, if you don’t want to provision a local environment to do this challenge, or are doing them on an iPad, try AWS CloudShell instead. It’s a Serverless development environment, free to use and has most of the tools you’ll need. Anything else you should be able to install without too much hassle. Thank me later!
Also, the link to download the project is actually at the end of the post, so you’ll need to skip to the Attachments section at the end, grab the link, wget it wherever you’re using it, unzip, then continue.

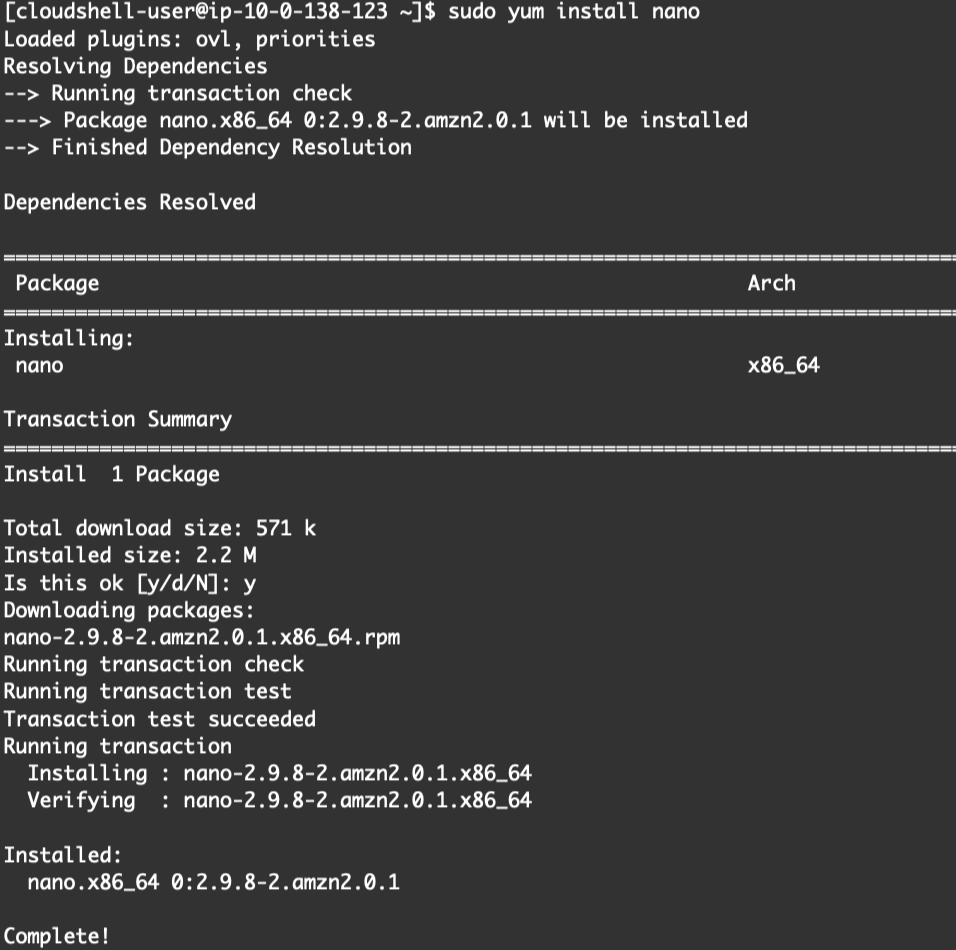
To install packages such as a terminal based editor, you’ll need to use yum with sudo for root access.
Make sure to create a programmatic user from IAM with EC2 and CloudWatch permissions to get the metrics. Or you can just add the managed Administrator role. ????
Leaving the rest of the options as per the default, I ran the following command. If you copied and pasted from the tutorial and have both Python 2 and 3 installed, note that you need to change this to python3 since we used pip3 to install the dependencies.
[cloudshell-user@ip-10-0-138-123 ~]$ aws configure
...
[cloudshell-user@ip-10-0-138-123 ~]$ python3 cwreport.py ec2
Fetching ec2 metrics for the past 24hour(s) with 300second(s) period....
No region and credential profile passed, using default region "ap-southeast-1" and using default configured AWS credentials to run script
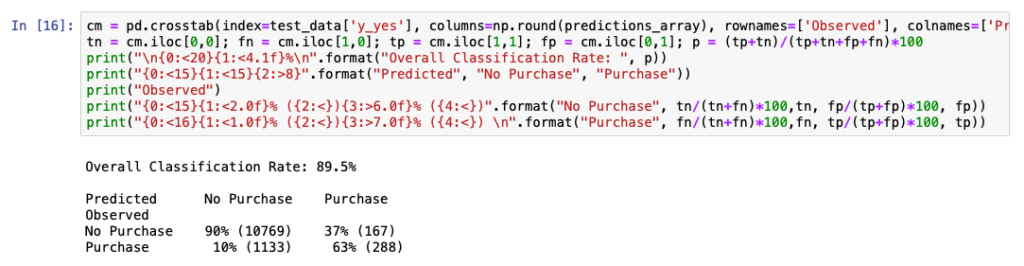
CSV file ec2.csv created.Honestly, this was the one I expected to be difficult and it turned out to be easy! And if you’ve completed Challenge 2, you’ll be able to get some useful output from this script.
If you want to practice deploying something to Lambda, my favourite Lambda script is aws-billing-to-slack, which you can get a fork of from here. This script puts the last day’s bill into my team’s Slack channel which is super useful for detecting early if things are a little more expensive than they should be.
Also, ACG, try this challenge yourselves, it’s fun! 😉
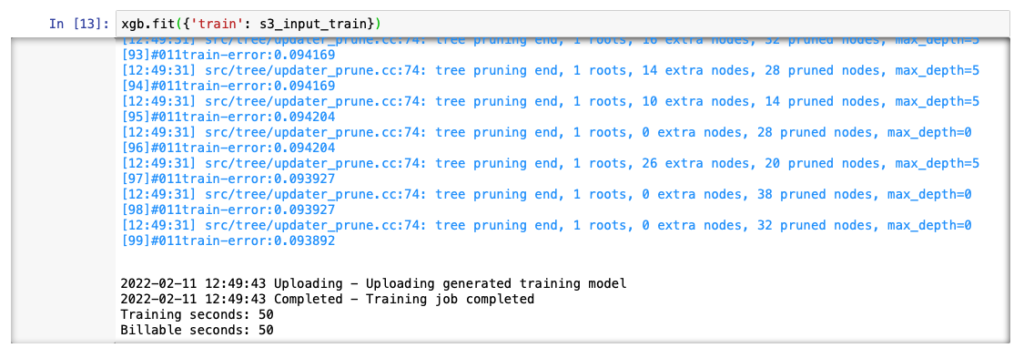
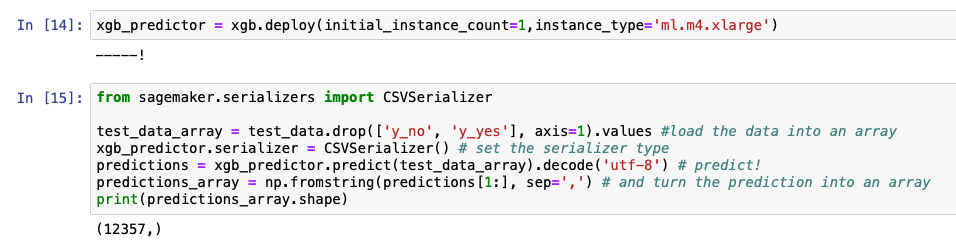
Challenge 5 – Train and deploy a machine learning model using Amazon SageMaker
A Serverless machine learning challenge! I love this tech, if you couldn’t tell from CattoCDN.
The AWS post linked to as a tutorial definitely needs an update though. Instead of paying for Amazon SageMaker, we can use Amazon SageMaker Studio Lab (Preview). That’s quite the mouthful, but essentially we get our experimentation environment for free instead of a few cents on SageMaker directly. Or, as you know with AWS, it could be quite a lot if you leave the ML instance running by accident. SageMaker’s pricing is a bit harder to understand for beginners, so I would highly recommend using Studio Lab for this challenge. Make sure to sign up before you want to do the challenge, as it is not a service you can access from the AWS Console. The team seems to be either limiting the number of available accounts or doing some manual verification.
Whilst I waited, I moved onto Challenge 6.
But this one wasn’t so bad even with SageMaker’s UI being a bit confusing. Not sure if I actually learned any ML though, since it was just copy paste, wait, copy paste, wait some more.
Also, you can’t use ACG Sandboxes for this one. ????

Even ACG knows you can do some serious damage to your wallet with Sagemaker!
Challenge 6 – Create a chatbot that translates languages using Amazon Translate and Amazon Lex
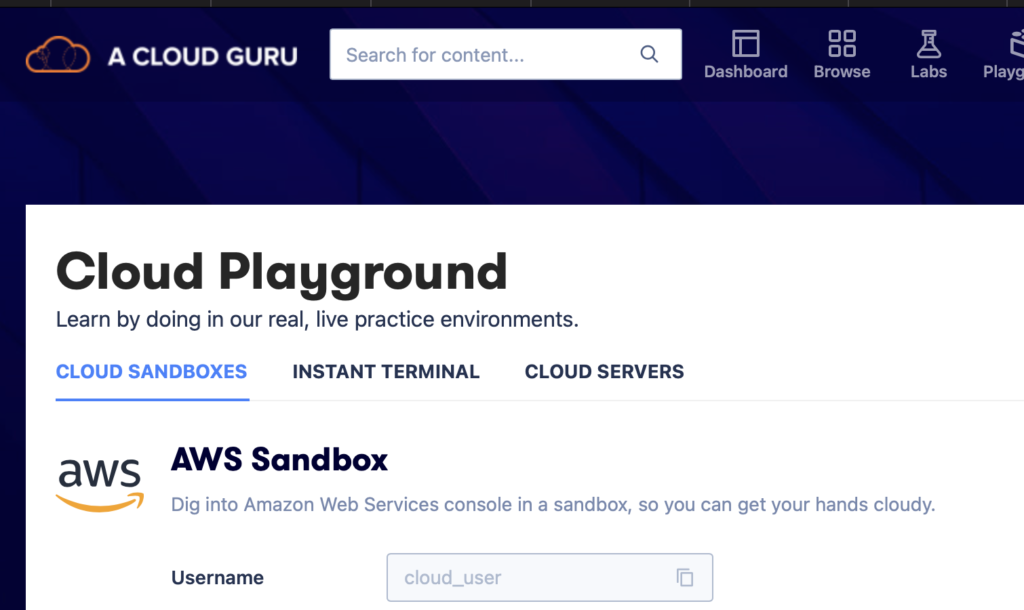
Oooh, this one was the most challenging. And not because of anything technical, but instead because the tutorial is super old (2018). That’s practically a dinosaur when it comes to AWS. We potentially get to use Amazon Lex, Translate, CloudFront, Cognito, AWS Lambda, and CloudFormation. That’s quite the stack to juggle, and definitely something I will use ACG’s Cloud Playground feature for! Not worth trying to clean this mess up.
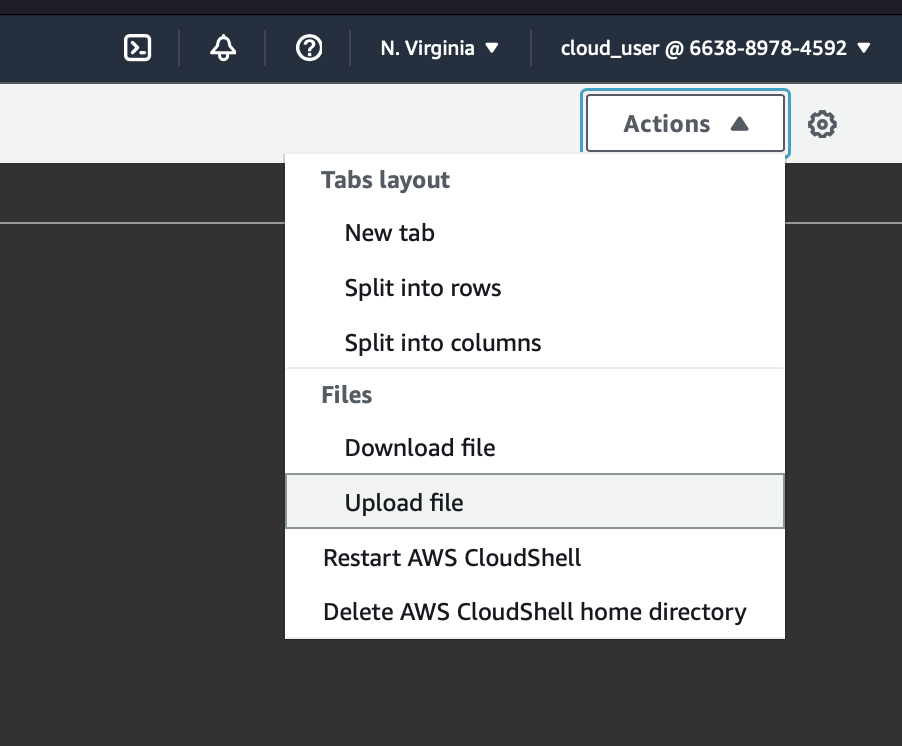
Also, this is another great candidate for CloudShell! Being someone that loves to learn quickly, and that means not having to debug my local environment every time I start a new challenge. Make sure to upload the sherlock.txt file using the Actions menu.
Since this tutorial is quite old, there are some things I would recommend changing. The first command, for instance, should use pip3 and without sudo. Like so.
[cloudshell-user@ip-10-0-51-250 ~]$ pip3 install -U nltk
...
Installing collected packages: tqdm, joblib, nltk
Successfully installed joblib-1.1.0 nltk-3.7 tqdm-4.62.3
And after that, sudo yum install nano and nano ml.py, pasting in the sample code from the article and saving with CTRL + x, y, and ENTER. Now to run it.
[cloudshell-user@ip-10-0-51-250 ~]$ python3 ml.py
[nltk_data] Downloading package punkt to /home/cloudshell-
[nltk_data]     user/nltk_data...
[nltk_data]   Unzipping tokenizers/punkt.zip.
Created json zip file for Lex Slot Import as trainingText.zip
Looks great, now to use the Download File feature in the Actions menu to download trainingText.zip.
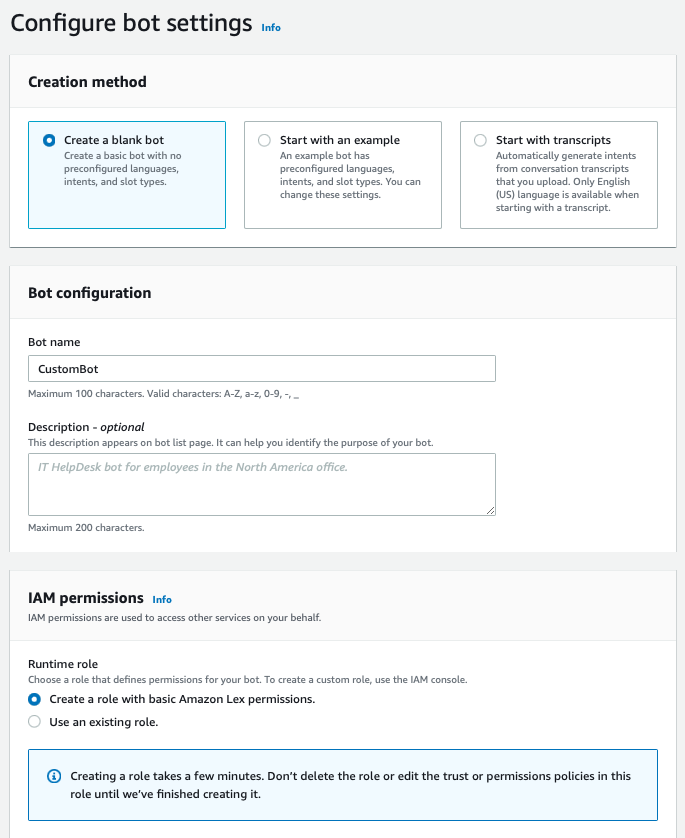
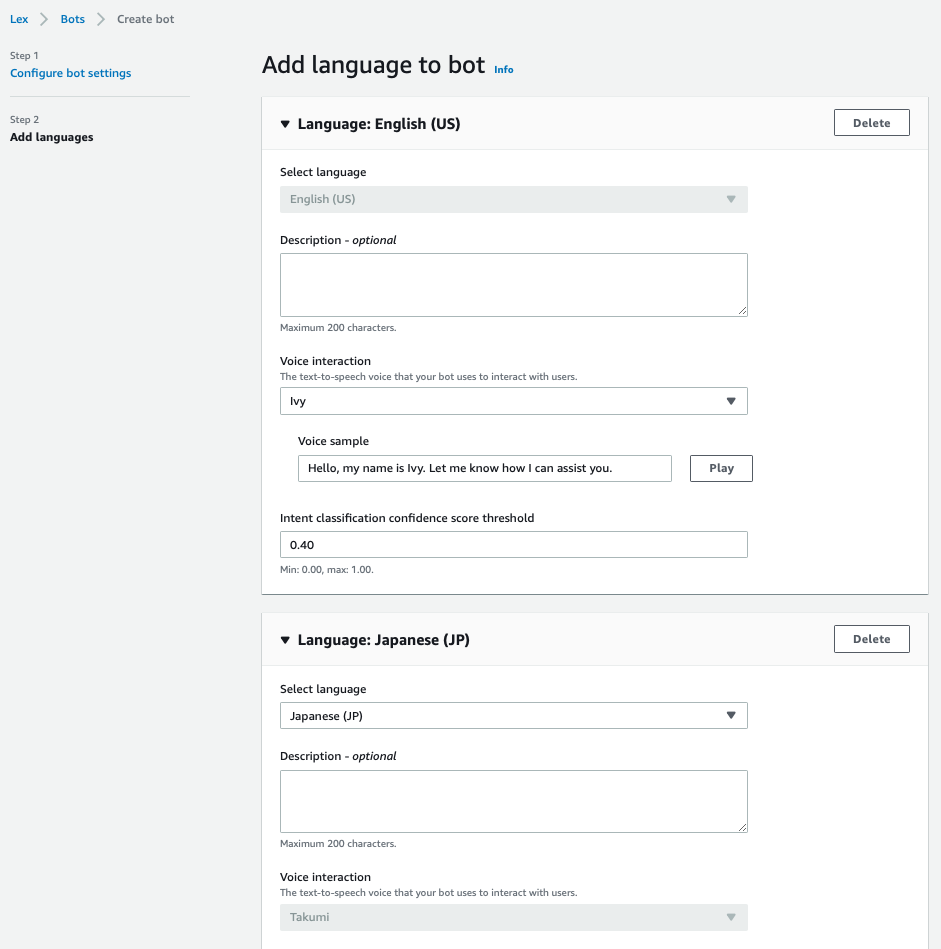
Since AWS hasn’t updated this article in forever, the screenshot they provide when creating the bot is a bit outdated. Here’s mine if you need help.
You will then get prompted to add a language. Select English. I wanted to see what happens if you give the bot multiple languages, so I also added Japanese.
Next, you’ll need to enter the Intent details, like so.
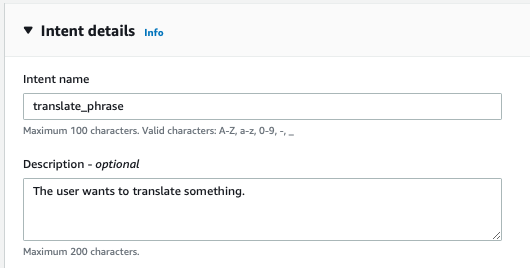
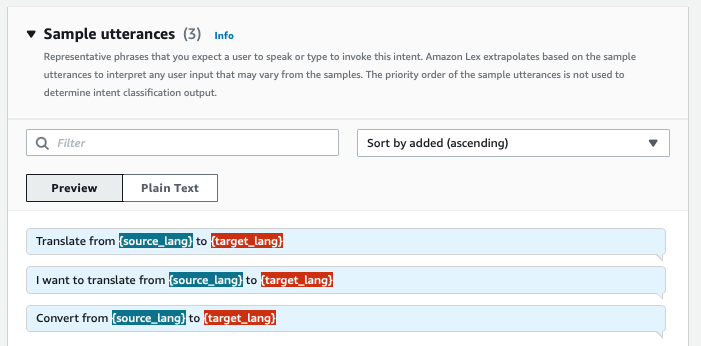
You’ll need to Save Intent, then exit out of the wizard. Go to Slot Types on the left hand menu, and then follow the tutorial. It seems to be correct, even if the UI in the screenshots is outdated. Go back to your translate_phrase intent in order to continue with adding the Slots with your newly created slot type.
And unfortunately, this is where I got stuck. You can’t import the trainingText.zip because imports are only supported on the v1 console, accessible on the left. But you can’t use resources from the v1 console in v2, and vice versa.You need to create an entire bot, then migrate it. Considering I spent more than a couple hours already getting this far, I didn’t really want to go from the beginning! Sad 🙁

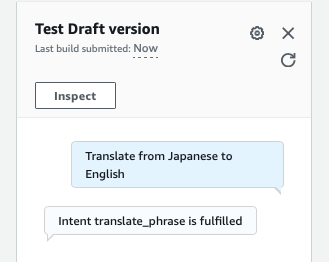
At least you can test the Intent directly on the page by pressing Save and Build.
Don’t give up! Thankfully, the rest of the tutorial is possible without using the intent directly. You can create the Lambda function with the correct IAM permissions attached, and it’s just like any other function.
I did some research and found this newer tutorial (Amazon Lex v2) which shows a “built-in” multi-lingual integration, so perhaps getting learners to follow this one might be a bit more future-proof. I did this one instead and it worked just fine! It even helps you make an Alexa Skill (Challenge 8).
Challenge 7 – Deploy a Simple React Web Application using AWS Amplify
Moving on from that last experience, we get to enjoy using AWS Amplify! This one was pretty fun, but not that straightforward for me. A mixture of bad luck (Amplify breaks on custom AWS profiles) and bad timing (they just updated all of the Amplify libraries to v2, which breaks the sample code from the tutorial). You’ll need to make sure you have the prerequisites such as NodeJS installed (this can easily be done on MacOS using Brew).
Definitely, this one is challenging for beginners and isn’t for the faint of heart. I do encourage following the instructions as best you can though, since you’ll probably learn something from the tutorial, even if you do not understand everything at the time. You’ll also get a GitHub account, if you didn’t already have one, and didn’t use make one in Challenge 3.
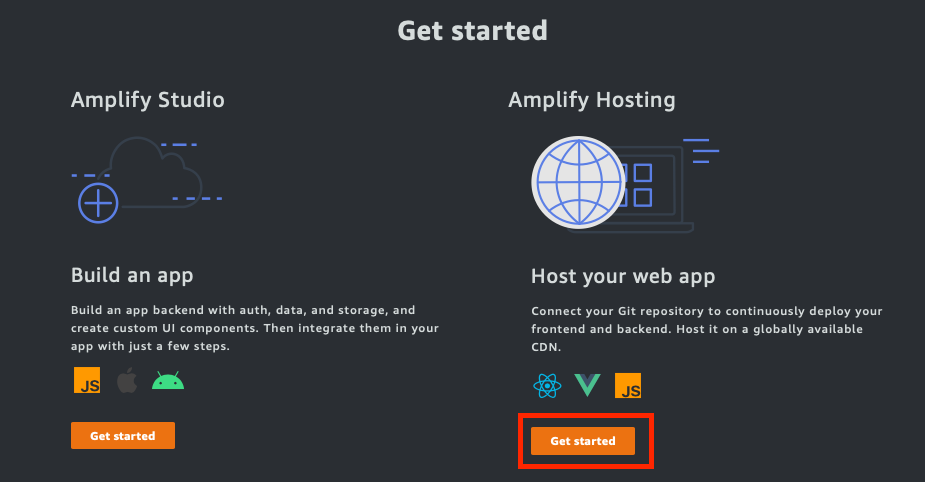
Creating the React application may take a while, so I recommend doing the GitHub repo setup whilst you’re waiting. And then, when you’re prompted to Get Started, press on the button under “Amplify Hosting”. UI changes will always make you think, and it’s one of the reasons why AWS is so complicated, even for power users!
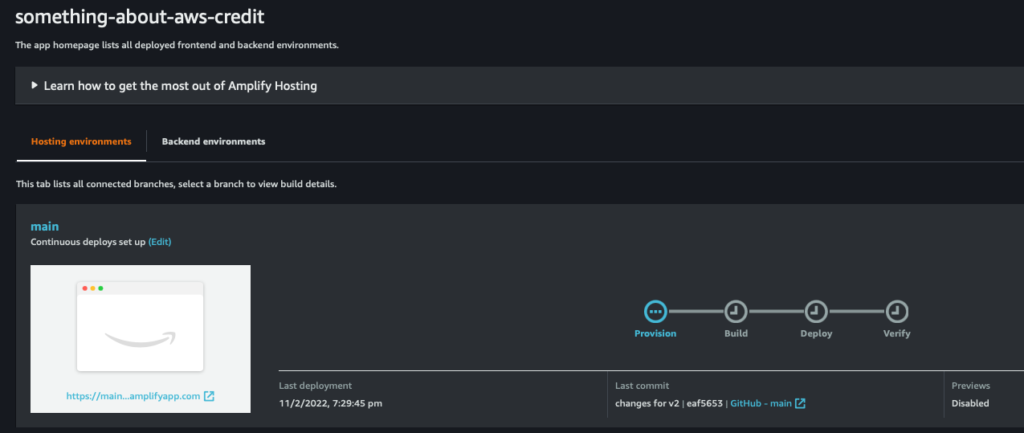
When pushing to GitHub, you’ll need to change the commands to use the correct " symbols and push to main, not master. Like so.
git add .
git commit -m "changes for v2"
git push origin main
By now, your laptop will probably be screaming from all of the JS execution. Mine definitely is!
The Open Admin UI button now reads as Launch Studio thanks to the launch of AWS Amplify Studio. The local setup also didn’t work in Incognito, which is used by the ACG Cloud Playground feature. Sorry, I had to log in via Chrome, which obviously isn’t preferable. Furthermore, it didn’t work because of my local AWS profiles, and broke instantly.
2022-02-11T10:41:08.308Z - error: uncaughtException: Failed to receive expected authentication tokens. Error: [TypeError: Cannot redefine property: null]So I grabbed a “different machine” and proceeded! This machine is called GitHub Codespaces, and it’s saved me from these environment-specific issues more than once.
If you’re also doing that, when authenticating via the Web UI, have a console open and look for the /amplifystudio/ call in the Network tab, then copy it as a cURL. Paste this into a new bash console in CodeSpaces, and it should return OK. Your authentication in the other terminal should also return the following. You can use the same token for a while, so if you’re prompted again to authenticate, you can just use Bash history and run the cURL command again.
✔ Successfully received Amplify Studio tokens.During the GraphQL API section, just accept the defaults as best you can, it seems like some of the options have changed.
Unfortunately, it also seems like you can’t use AppSync with ACG Cloud Sandboxes! So make sure to do this in your own account!
Reason: User: arn:aws:sts::663889784592:assumed-role/us-east-1_EtidVhPDi_Full-access/amplifyadmin is not authorized to perform: appsync:TagResource on resource: arn:aws:appsync:us-east-1:663889784592:* with an explicit deny (Service: AWSAppSync; Status Code: 403; Error Code: AccessDeniedException; Request ID: fed9e8f0-d7af-4357-950c-7a7ad621d7dc; Proxy: null)Thankfully, I was still able to complete this by doing it locally! Though, a lot of stuff was broken, thanks to these two issues. I wouldn’t recommend a beginner to work on this unless they had extensive React/JS knowledge. I got some help from a friend who works as a frontend developer, thanks! You know who you are.
- https://github.com/aws-amplify/amplify-cli/issues/9498
- https://stackoverflow.com/questions/70036160/amplifysignout-is-not-exported-from-aws-amplify-ui-react
Challenge 8 – Create an Alexa Skill that provides study tips using AWS Lambda and DynamoDB
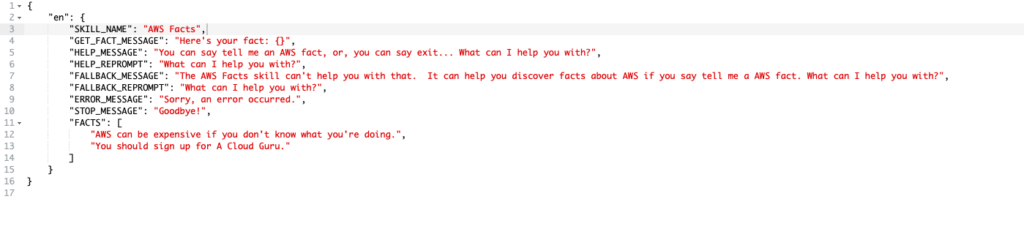
Now this one was fun, and very open ended! I ended up picking Alexa’s Python framework with the “Facts” quick-start. You don’t even need a DynamoDB table, since you can use a JSON file inside the skill.

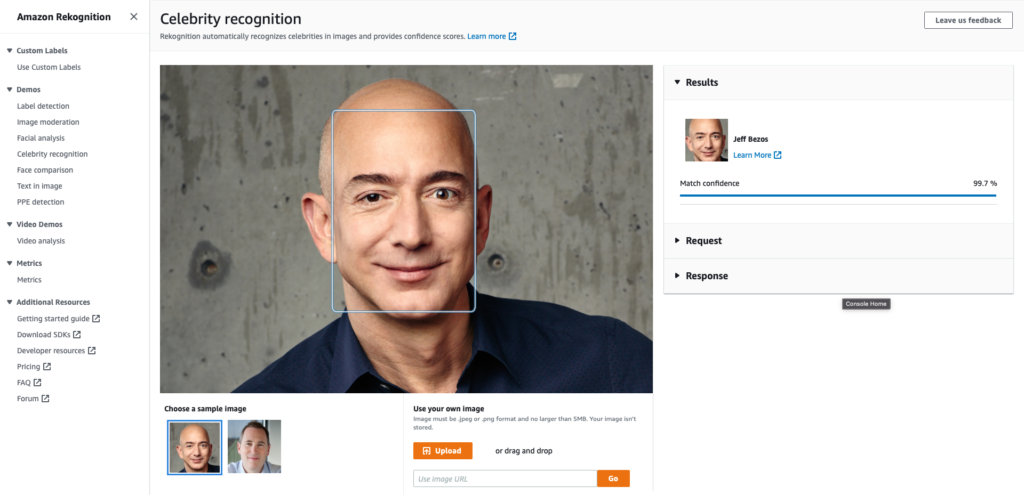
Challenge 9 – Recognize celebrities using Amazon Rekognition, AWS Lambda, and Amazon S3
I think this was the easiest so far! Rekognition actually comes with a demo system which allows you to test celebrities. I’ve already used boto3 and Python to detect cats using Rekognition in this article.
Challenge 10 – Host a Dedicated Jenkins Server on Amazon EC2
This one was pretty simple too, but I would recommend linking to this page instead for an easy-to-use CloudFormation template!
Perhaps something like “Using Jenkins on (ECR or EKS)” would be harder, since this is the last challenge. CI for me though has always been something I just leave to another company to manage since there are so many great options. Though I understand that sometimes, you need your own CI platform. I just haven’t worked on one of those projects yet!
What did I learn?
- Lots of new services!
- AWS Tutorials are always out of date if they’re written more than one re:Invent ago.
- Problem solving is an essential skill to have as an AWS Cloud Architect!
ACG, if you’re reading this, I would highly recommend updating this list to be a bit more friendly to newbies and experienced architects. Whilst it’s fun to get in the weeds, it isn’t so much fun to follow outdated resources!
Anyway, this is my longest post yet! After a full day of AWSing, it’s time to wrap it up. It was a fun experience! ????